
Achieving a level and smooth floor surface is a crucial step in the construction or renovation process of any building. One effective method to achieve this is through screeding, a process that involves the application of a layer of material to level the floor.
Whether you’re preparing for tile installation, carpeting, or any other flooring material, screeding is a fundamental step that ensures a sturdy and even flooring foundation.
In this comprehensive guide, we’ll walk you through a 10-step process to screed a floor successfully, covering everything from preparation to finishing touches.
Step 1: Assess the Subfloor
Before embarking on the screeding process, it’s essential to assess the existing subfloor thoroughly. Remove any debris, dirt, or loose material, and repair any cracks or uneven surfaces. The success of the screeding process greatly depends on the condition of the subfloor, so take the time to address any issues before proceeding.
Step 2: Gather the Necessary Tools and Materials
Prepare a comprehensive list of tools and materials required for the screeding process. Common tools include a straight edge, spirit level, mixing equipment, and a trowel. The materials you’ll need may vary depending on the type of screed chosen. Traditional sand and cement screed, self-levelling screed, and polymer-modified screed are some common options.
Step 3: Establish a Framework
Create a framework around the area to be screeded using wooden battens or metal strips. This framework will serve as a guide, ensuring that the screed material is distributed evenly and at the desired thickness. Properly secure the framework to prevent movement during the screeding process.
Step 4: Mix the Screed Material
Depending on the type of screed chosen, mix the appropriate ratio of materials. Traditional sand and cement screed typically require a mix of one part cement to three parts sand. Self-levelling screed comes in pre-mixed bags, but follow the manufacturer’s instructions for the correct water-to-screed ratio. Thoroughly mix the materials until you achieve a smooth and workable consistency.
Step 5: Apply the Bonding Agent
If your subfloor is porous, applying a bonding agent before screeding can enhance the adhesion of the screed material. This step is particularly crucial for ensuring a strong and lasting bond between the subfloor and the screed. Follow the manufacturer’s instructions for the application of the bonding agent and allow it to dry completely.
Step 6: Pour and Spread the Screed Material
Start pouring the screed material into the framed area, distributing it evenly across the surface. Use a trowel to spread the screed, ensuring that it reaches all corners and edges of the framework. Work systematically to avoid leaving gaps or uneven thickness. For self-levelling screed, follow the specific pouring guidelines provided by the manufacturer.
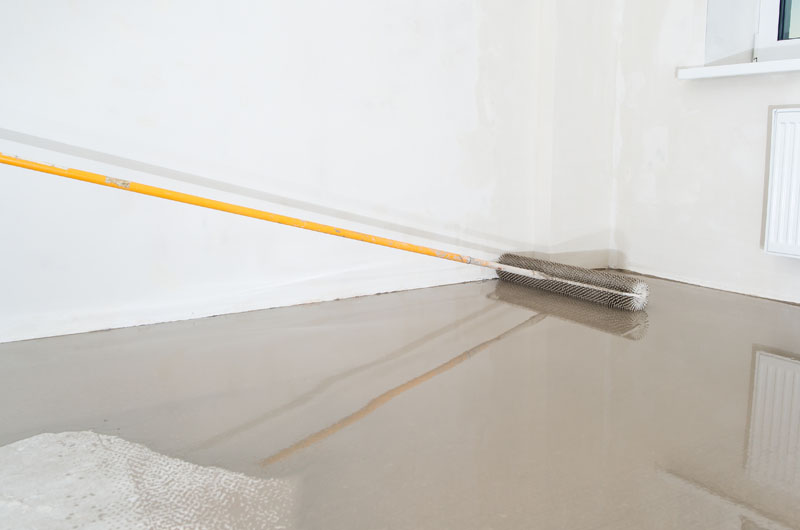
Step 7: Level the Screed
Once the screed material is evenly spread, use a straight edge or a screed board to level the surface. Move the straight edge in a sawing motion to eliminate any excess material and achieve a smooth, flat surface. Check the levelness regularly using a spirit level to ensure an even finish.
Step 8: Allow the Screed to Cure
After levelling, allow the screed to cure properly. The curing time may vary based on the type of screed used, ambient temperature, and humidity levels. Traditional sand and cement screed may require several days to cure, while self-levelling screed often has a shorter curing time. Follow the manufacturer’s recommendations for the specific screed material you’ve chosen.
Step 9: Fine-Tune the Surface
Once the screed has cured, inspect the surface for any imperfections. If necessary, use a hand float or trowel to smooth out any rough spots or irregularities. This step is crucial for achieving a flawless finish, especially if the floor will be left exposed or covered with a thin flooring material.
Step 10: Finish and Seal the Screeded Floor
To enhance the durability and longevity of the screeded floor, consider applying a sealant or finishing coat. Sealants protect the surface from moisture, stains, and wear, extending the life of the screed. Choose a sealant that is compatible with the type of screed used, and follow the manufacturer’s instructions for application.
Which Floors Require Screeding?
Screeding is a versatile technique that can be applied to various types of floors, depending on the construction project’s requirements.
Tile Installations
Before laying tiles, screeding provides a level surface that ensures the tiles adhere uniformly, preventing uneven edges or breakage.
Carpeting: A smooth and level floor is essential for the proper installation of carpets. Screeding eliminates bumps or dips that can affect the appearance and lifespan of the carpet.
Vinyl and Laminate Flooring: These types of flooring materials require a stable and level surface to prevent issues such as buckling or warping. Screeding provides an ideal foundation for the installation of vinyl or laminate flooring.
Exposed Concrete Floors: In situations where the concrete subfloor is intended to be the finished floor surface, screeding is necessary to achieve a polished and level appearance.
Underfloor Heating Systems: For projects incorporating underfloor heating systems, screeding is often used to encapsulate and protect the heating elements while providing an even surface for flooring installation.
In conclusion, screeding is a crucial step in achieving a level and sturdy floor surface for various types of flooring installations. By following the 10-step process outlined above and understanding which floors benefit from screeding, you can ensure a successful and long-lasting result. Whether you’re a seasoned contractor or a DIY enthusiast, mastering the art of screeding will contribute to the overall quality and durability of your flooring projects.