
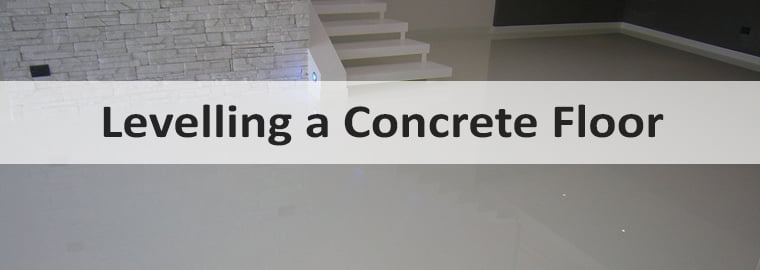
If you’re laying new carpet or laminate and your concrete subfloor surface is uneven, it’s worth taking the time out to level out any of the marks, scuffs or even dips and imperfections.
The best product to use for levelling a concrete floor is a Floor levelling compound. That’s because it will help you to achieve a smooth and even surface.
It’s fairly easy to do when you use the right tools and equipment.
That’s where this guide come in. We are going to show you exactly how to level out your concrete floor ready for laying your new underlay and carpet or laminate.
We also give you tips on preparing the area and how long you need to wait before using the area for walking on or placing the furniture.
Not sure which underlay you need either? Don’t worry.
We have you covered on underlay too – simply head over to our Best Underlay FAQ’s page or our product pages to read more about which underlay is right for you.
When levelling out concrete, it’s the same as anything – preparation produces perfection – say that fast.
Tools you need for levelling
You will need:
- 3 large builder’s buckets
- 1 for the water
- 1 for mixing the compound
- 1 for tools when you’re not using them
- Heavy duty power drill
- Spiral mixer
- Rubber gloves
- Protective clothing – breathing mask; splash proof googles
How to prepare the concrete area for levelling
Firstly, soak the area lightly, using a spray, then sweep the floor thoroughly. The light spray will stop the dust from flying around the room while you’re sweeping.
That means you won’t need a dust mask.
Also, make sure you only sweep and don’t be tempted to use your hoover. Mainly because it might get damaged by the concrete dust and your partner or parents won’t be very happy.
Do a thorough inspection on the floor to see if any repairs are required – check for any grease or oil on the surface – if there is, use a suitable de-greasing agent to clean it. Have a read of this article for more info on oily floors
Most standard floor levelling compounds can be applied up to a maximum of 5 or 6mm in thickness.
Some products can be applied at greater thicknesses – always check the manufacturer’s instructions.
If any holes, cracks or dips in the floor are deeper than the max thickness that the levelling compounds – they will need to be fixed with a suitable concrete repair compound first – again check the levelling compound’s manufacturer instructions to find out the max permitted thickness.
Laying the Concrete Levelling Compound
1. Sealing the Surface
Seal the surface with a diluted PVA adhesive mix or suitable acrylic primer using an old paint brush.
Then give it time to dry – don’t forget your knee pads, you could be on your knees for a while
While waiting for the primer to dry, work out how much levelling compound is needed.
2. Working out how much levelling compound you need
To check the thickness of dips – place a spirit level across the floor area and measure from the deepest section up to the spirit level – using a steel ruler or square is much better than a tape measure.
Check weather the floor has a slope – if it does, then the thickness of the levelling compound will need to be different in different parts of the room
It’s important to find out the average thickness so you can work out how much levelling compound you need
Work out the area of the room in square meters, then work out the average thickness that you’ll be spreading the compound to – then refer to the manufacturer’s coverage guidance on the packaging.
Once the floor is prepared and sealed, you’ll be ready to level it.
3. Mixing the compound
Don’t forget to wear overalls to protect your skin and clothes.
Read the instructions before you start so that you will be sure to mix the compound to the right consistency.
We don’t advise you to mix in the room that you’re levelling – try doing it in an outdoor area if you can.
Lay tarpaulin or any form protective sheeting in the are where you will be mixing.
Latex modified, self-levelling compound has high bonding strength and the latex means it has high flexibility when it has set.
Some are also rapid drying.
Any powdered based product will need mixing with water to produce a thick pourable solution.
It’s a lot easier if you have a helper – one person can mix, while the other person is spreading.
Generally – each 25kg bag requires 5 Litres of water. Fill the bucket up with 1 part water and add 5 parts powder
I might make it easy if you use 5 kilograms of levelling powder to 1 litre of water.
If necessary, use a bucket and some luggage scales to help you measure out the right quantity.
Keep the power drill on a slow speed so that the mixture doesn’t fly out – don’t over mix because it will entrain any unwanted air into the compound
Don’t mix up too much compound in advance because it will start to set in the bucket.
4. Spreading the Compound
Once you start spreading the compound, we recommend you do it all in one go. That’s because it’s very difficult to spread once it hardens.
Give yourself enough time in the day to get it all done. If you’re doing a big room be sure to start early.
Fix a temporary baton to the using masonry nails to stop the compound running into the next room.
Use a flat edge plasterer’s trowel to spread the compound.
Start pouring the compound at the edge that is furthest away from the door. Work quickly using the plasterer’s trowel in long strokes to spread the compound to the required thickness.
If you get any compound on the skirting board, you can remove this later when the compound has set, using a flat scraper and damp cloth.
Providing the floor has been sealed and the compound mixed to the right consistency, the trowel marks should disappear after a few minutes.
Don’t overwork the compound
Gradually work your way across the room and out of the door.
5. Leaving to dry
It will take around 30 minutes for the surface to harden and you can walk on it after 2-3 hours.
Make sure you check the manufacturers specified drying time before laying any floor covering, such as underlay.
For some, 18 hours drying time is needed before you can lay anything onto it.