
A floating floor is not directly attached to the subfloor. Instead, it “floats” on top, allowing for some movement and flexibility.
In this article, we’re explaining the different designs that sit within the floating floor category.
While floating floors are designed to have a certain degree of flexibility, excessive movement can lead to gaps, noise, or even damage over time.
Therefore, proper installation and following the manufacturer’s guidelines is crucial to ensure the stability and longevity of a floating floor.
We’ll also explain the aesthetic designs, and construction technologies that help them ‘float’. We’ll also give a quick overview of how to install them and the most popular rooms for installing.
What are the different designs of floating floors?
While it may seem like there are lots of different styles of floating floors, there are 2 main types.
Wood
Most, if not all types of wood, laminate or engineered wood floors are classed as floating floors.
Wood floating floors have gained significant popularity in households due to their combination of aesthetic appeal, ease of installation, and practicality. Many homeowners were choosing engineered hardwood, laminate, or luxury vinyl depending on their needs and budgets.
Tile
Floating tiles are less common. However, there are specialist types of floating tile systems that have been developed to provide some of the benefits of floating floors while using tile materials. These systems are more commonly used in commercial settings or areas with specific requirements.
Floating Floor Construction & how it stays in place
Overall, a floating installation simplifies DIY and reduces mess. It stays in place through a combination of its weight, interlocking mechanisms, and friction between the flooring materials and the underlying subfloor.
Tongue & Groove Mechanism

Tongue and groove is where two adjacent boards are designed with projecting edges (tongues) and corresponding grooves. These tongues fit into the grooves of the adjoining board, creating a tight and secure connection. In floating floors, this interlocking mechanism plays a crucial role in ensuring stability and preventing movement between the individual flooring planks or tiles.
When used in floating floors, tongue and groove connections facilitate easy installation. The snug fit created by these interlocking edges helps hold the flooring pieces together, forming a unified surface that resists shifting. This mechanism also aids in maintaining the structural integrity of the floor, removing gaps that could lead to creaking or separation.
It allows the floor to move as a single unit while accommodating expansion and contraction. Tongue and groove enhance the longevity and overall performance of floating floors, making them a popular choice for homeowners seeking both style and practicality.
Click Lock System

The click-lock system is a modern flooring installation method, offering convenience and stability. Each plank or tile is designed with special edges that can be easily snapped together without the need for adhesives or fasteners. This system streamlines the installation process, making it suitable for DIY projects.
Click-lock systems enhance the functionality of floating floors by ensuring a secure connection between planks. The audible “click” sound indicates successful installation, allowing for visual and tactile confirmation. Unlike traditional tongue and groove systems, click-lock doesn’t require precise angling or hammering, saving time and effort.
While both systems offer stable floating floor installations, click-lock often features a stronger, more snap-resistant connection. Tongue and groove, on the other hand, might demand slightly more precision during installation. Ultimately, the choice between the two depends on personal preference, skill level, and the specific flooring material being used.
Floating floor installation
Before installing
You may want to conduct a moisture test on any concrete subfloors before laying anything down.
Also, consider whether you want to fit it yourself or get a professional in.
It’s usually recommended to have a professional contractor screed the floor if it’s uneven.
That’s because the screeding is arguably by far the most important part of making the new floor last longer.
Preparing the subfloor
- Ensure the subfloor is clean, dry, and free from debris. Remove any existing flooring and adhesive residues.
- Check the subfloor for levelness and flatness. Use a levelling compound to correct any irregularities, ensuring a smooth surface.
- Lay down a moisture barrier, especially over concrete subfloors, to prevent moisture from seeping into the flooring materials.
- Install an appropriate wood or laminate 5mm underlay for sound absorption, insulation, and additional cushioning. Follow manufacturer guidelines.
How to install a floating floor
Begin Installation:
-
- Start installation against the longest wall or the primary light source.
- Leave the recommended expansion gap around the perimeter using spacers.
Interlock Planks or Tiles:
-
- If using a click-lock system, fit the planks together at a slight angle, then press down to engage the locking mechanism.
- If using a tongue and groove system, insert the tongue into the groove of the adjacent piece at a slight angle, then press down to lock.
Stagger Rows:
-
- Stagger the end joints of consecutive rows to create a natural and strong pattern. Usually, a 1/3 offset is recommended.
Trim for Length:
-
- Measure and cut the final plank in a row to fit, leaving the appropriate expansion gap.
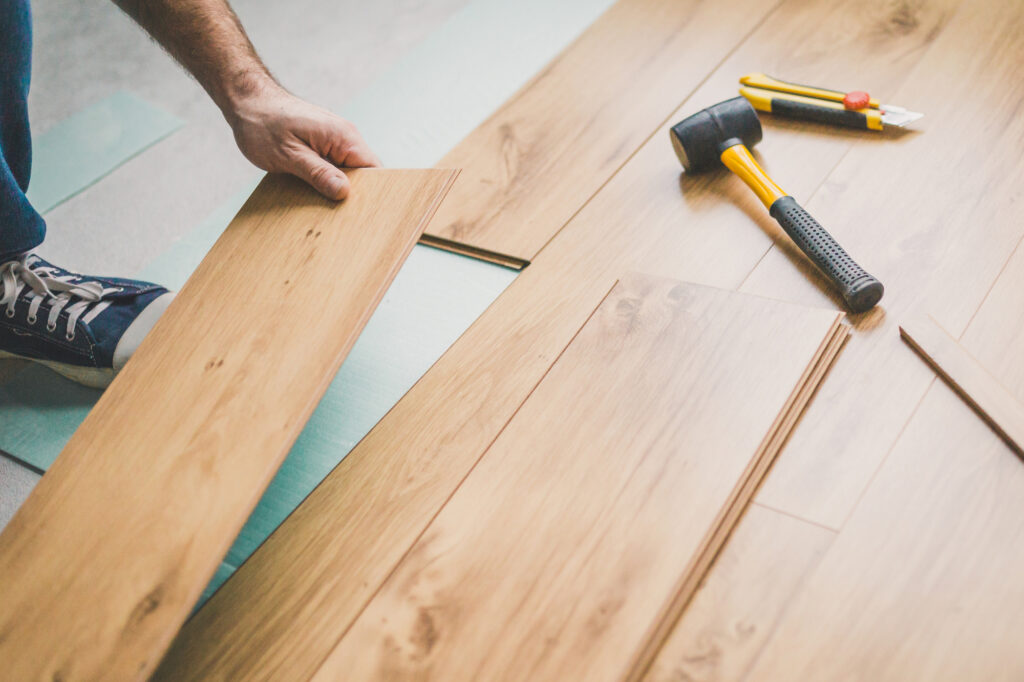
Use a Pull Bar and Tapping Block:
-
- Use a pull bar to help fit the planks together tightly in areas that are hard to reach.
- Utilize a tapping block and hammer to gently tap planks into place without damaging the edges.
Work Around Obstacles:
-
- When you reach doorways, vents, or other obstacles, make necessary cuts for a precise fit.
Finishing Rows:
-
- When installing the last row, you might need to cut the planks to fit the remaining space.
Remove Spacers:
- Once the flooring is fully installed, carefully remove the spacers around the perimeter.
Install Baseboards or Trim:
- Install baseboards or moulding to cover the expansion gap and create a finished look.
Most popular rooms to install a floating floor
Floating floors are versatile and can be installed in various rooms throughout a home. The popularity of installing floating floors can vary depending on the type of flooring material and the specific benefits it offers. Here are some of the most popular rooms where floating floors are commonly installed:
Engineered hardwood, laminate, and luxury vinyl planks are popular choices in the living room, bedroom or kitchen.
That said, kitchens are mostly associated with LVT or ceramic tiles.
It’s quite common to also place a rug in areas of relaxation to soften the feel of the room.