
When you move into an old home, you might want to replace the flooring.
Often in upstairs rooms, the flooring, be it carpet or anything else, is likely to have wooden floorboards underneath. Creaking floor boards can be truly annoying. Especially if you have small children.
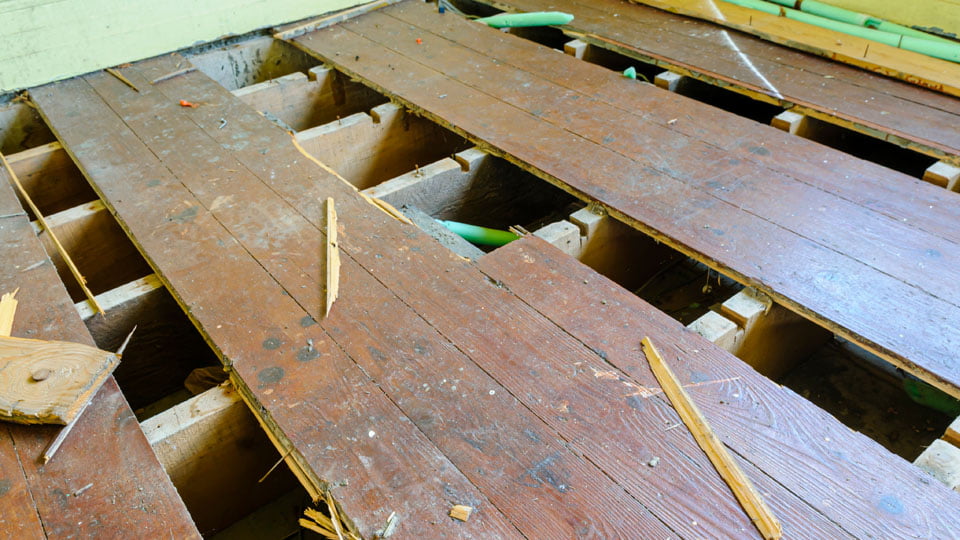
When you reveal the floorboards, it’s likely there will be rotten, uneven boards or just loose creaking boards that make up the flooring itself. This is much more prevalent in old houses of course.
If you take the decision to remove the old floorboards and literally do a full renovation, there are a few things to be cautious about. One being wires and electricity cables running along the joists.
One thing is for sure though, in old houses, you just never know who’s been getting at the internal layouts. Meaning it’s impossible to know where cables are trailing to and from.
So, in this article, we’re telling you how to carefully remove old floorboards without affecting the electricity cables or hidden piping.
Lifting the old floorboards is actually pretty easy but let’s start with the equipment needed to get the job done.
Tools needed for lifting and removing old floor boards
- Gloves (to avoid splinters)
- Knee pads (to protect while kneeling down)
- Utility bar (a.k.a crow bar) to lift the boards
- Cable and pipe detector
- Replacement boards or hole coverings
- Claw hammer
- 530mm long utility bar
- Electric screw driver
- Jigsaw (if necessary – see below)
- Metal ruler and pencil
- 12mm flat wood drill bit
Remember, once you’ve removed a board, you need to cover the hole straight away. Whether that’s with the board you want to put in place or just a temporary fix. Doing so will definitely stop you falling down and even worse, potentially you or someone else twisting your ankle.
Lifting the boards – step-by-step
Find the first board to remove
If there are any short pieces of board that you need to get out, start with these. Often they may not even be screwed or nailed down and you can just lift them out. You’ll need your utility bar to get underneath it though as the gaps are often very small. Although some people have reported lifting them out with their hands.
Check below the boards
- Check to see if any of the board is fixed with screws
- Remove any screws that are in the boards you want to take up
- Check for pipes and cables using your pipe and cable detector
- Scan on either side of the joists – joists are usually where the nails or screws are in
- Note, nails going into the joists may give you a false reading so be sure to scan either side and outwards from the joists
- Knowing which side the cables or pipes are on will tell you which direction they are going to be running in
Lift the first floorboard
- If the shortest piece is nailed down, then use the hammer to drive the utility bar down the gap of the longest side of the board, then lever the bar to lift it up, bringing the nails with it.
- Remember when hammering down the gaps only go as far as the bottom of the board – don’t go lower.
- Once the board is lifted, find any nails that are sticking out of the bottom of the board, bang them through the top side and pull them out completely. That way you can be sure you or anyone else won’t be stepping on any nails accidentally.
If there are no short ones, cut a long piece in two
If there are no short boards next to any of the joists, which can be removed first, then it’s best to make a cut across one of the large boards using a jigsaw. Be extra careful to find out if there are any wires or pipes underneath if you do decide to go down this route.
- Slide your ruler down the side of the board to identify which side the joist is on
- Mark a straight line across the board for you to follow while cutting
- Drill a 12 or 16mm hole in the board using a flat wood drill bit
- Cut across the board using a jigsaw
- If there is wiring underneath. then its best to manually saw from the top of the board and avoid going deeper than the joist. There are special saws you can get for this job too. Commonly known as a floorboard saw or a round nosed saw for cross cutting
- Once the board has been cut in two, you can begin to lift it with your lever bar

Lift the next (long) floorboards
Once the shortest board has been removed, it’s time to remove the larger ones. Here’s some guidelines on how to do that.
- Gently drive the curved end of the utility bar to lift it up from one end.
- If you’re struggling to lift it, you could use another utility bar to give you some more leverage.
- When you’ve lifted the end, put a small piece of wood underneath it to hold it up
- Then work your way along the side of the board with the utility bar
- If you don’t want to damage the boards next to the one you’re lifting, it’s recommended to use a small piece of plywood or something similar between the utility bar to avoid damaging the surface
- If you can’t do the job with a standard utility bar, then you may want to try using a wrecking bar which is much more heavy duty.
- Make sure there are no nails left in the joists after lifting up the floor. Remove any remaining nails and then sweep the joists.
Once you’re happy you’ve gotten up all the old rotten boards, the job is done and your new floorboards are ready to be fitted and then renovated or a new carpet over the top.
Remember to come back to Underlay4u when buying your products getting your sub floor into tip-to- condition